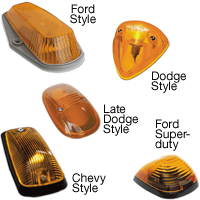
I decided to install cab lights on my 96 and wanted the same style as came on my 99. The 96 truck still had the old, tear-drop style light if they came stock on the truck. To each his own, but I preferred the newer style myself. The Dodge PN for the new style light kit ("Late Dodge Style" in below pic) is: 82207252
The Dodge PN for the older, tear-drop style ("Dodge Style" in above pic) is: 82205120
Both are full kits that have the lights, bulbs, assembled wiring, template and instructions, albeit very simple instructions that don't explain much.
Please forgive the picture quality. I have a dark colored truck and the contrast in some of the pics suffers because of this. I tried to adjust the pics to the details were easier to see, and this made some of them more washed out. I will take better pics, I hope, when we do the cab light install on my Dad's white 95.
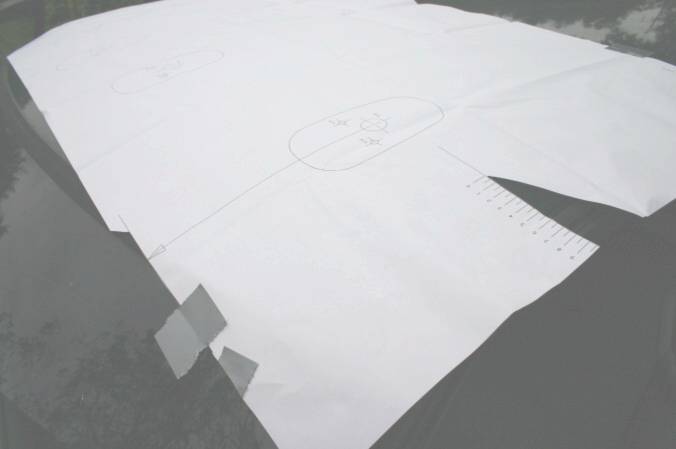
Here you can see the template laid out on my roof. NOTE: I have since found out that this template is for 3rd gen trucks, and will be off a ways if used on the second gen. I was not aware of this when I did my install. It wasn't a show stopper, but I had to make some adjustments because of it. Thanks to Phil for this info. See his install page here: http://www.phildorsett.com/clearancelights.html
Note, pics to follow are of the template, but don't bother with it for the second gen truck. The best way to do the second gen truck is to pull the headliner then put your 7/8" hole saw through the inner frame holes to drill through the roof. When you get in there it will be obvious what I am talking about. Then you holes will be in exactly the right place. You will want to cut out one of the lights on the template and use it to position the screw holes after you drill the bulb/wiring holes.
I did my truck with the template as seen below, and without a hole saw. I learned from both mistakes and the next installation I did, on my Dad's 95, went much easier. Skip down to the inner frame pics, or the installed pics.
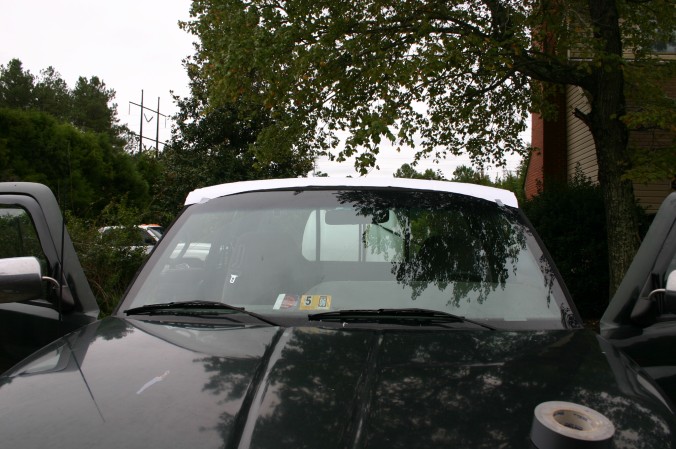
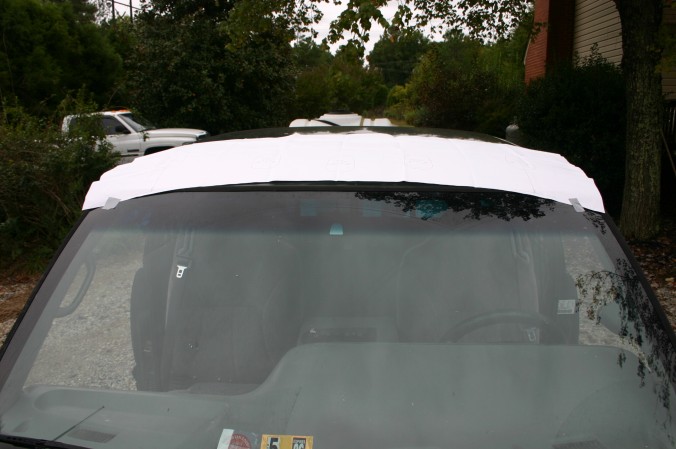
Another of the template.
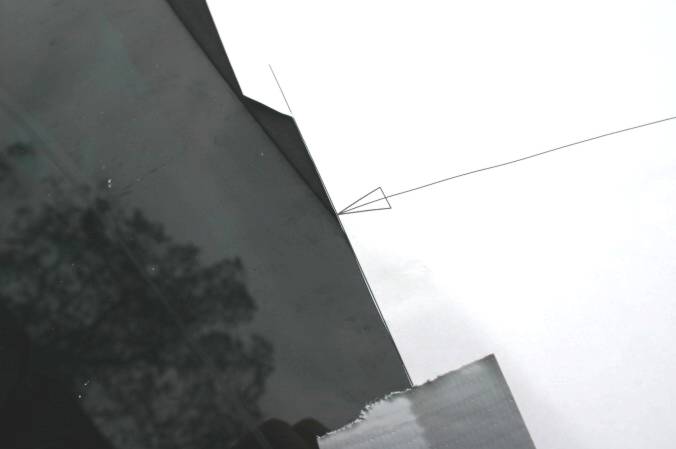
Cut on the lines of the template so you can see exactly where you are lining up. This is one of the places where the instructions, and the template, were vague. I took the meaning to be line up the arrow with the bottom edge of the windshield gasket, as best I could determine from the diagram. It wouldn't have really mattered if I went from the top edge of the gasket, as I found out later in the installation, but that will be explained below.
Cut out along the lines again, on both side of the template, so you can see the cab edge and compare it to the "ruler" on the template.
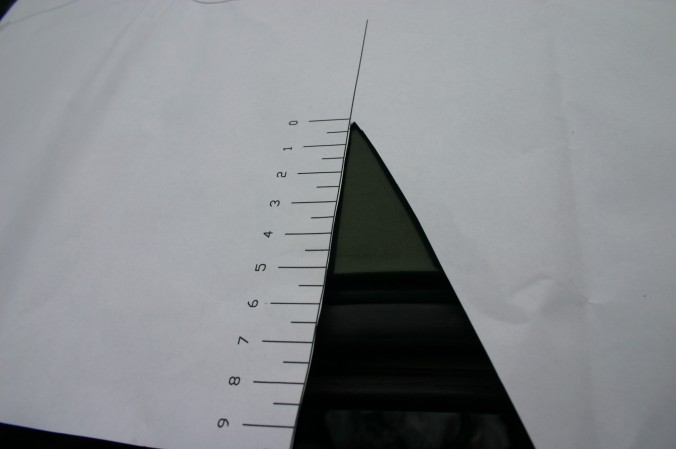
A shot of the 2 edges lined up. Duct tape holds the best for this procedure, especially since you will be pulling up the tape and shifting the template multiple times, depending on how anal you are..
I then center punched all places on the template to mark the hole locations. I couldn't see a reason to drill right through the template as the drill might rip it and throw off other holes. The center punch marks are difficult to see on this dark colored truck so I marked beside the punch locations as I pulled the template off. I then drilled the holes as specified in the instructions. I drilled ALL holes the same size, the screw hole size.
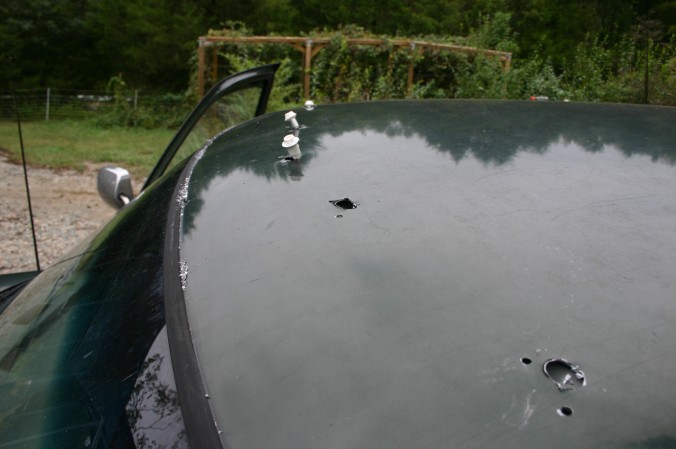
I then went back with a 3/4 drill for the larger holes. This probably should have been done by stepping up more, but I don't know how much it would have helped. The 3/4 drill grabbed hard in the sheet metal as it broke through. I had to have more pressure than I would have like on it just to keep it from bouncing around, and when it broke through it grabbed and ripped at the sheet metal. I tapped the edges with a hammer to get them back down a little, but the light lenses do have clearance for the bent metal if you cannot get it flat again.
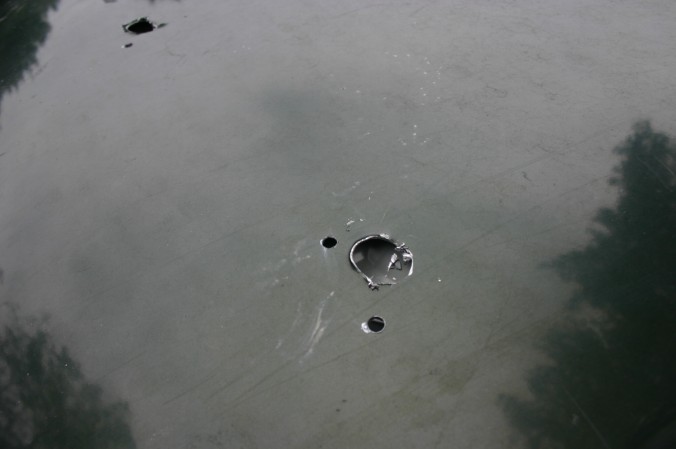
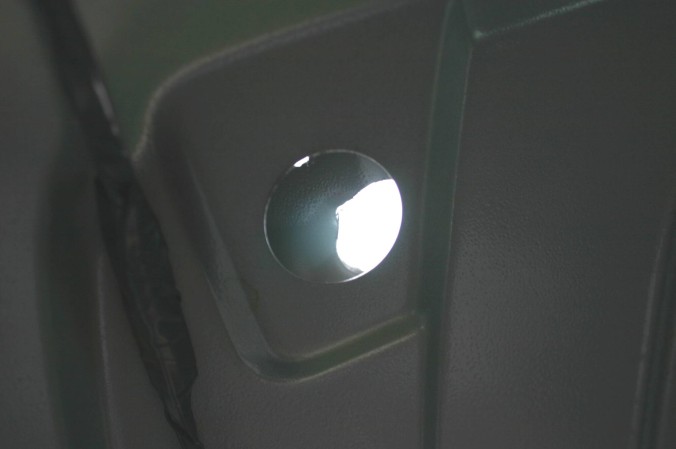
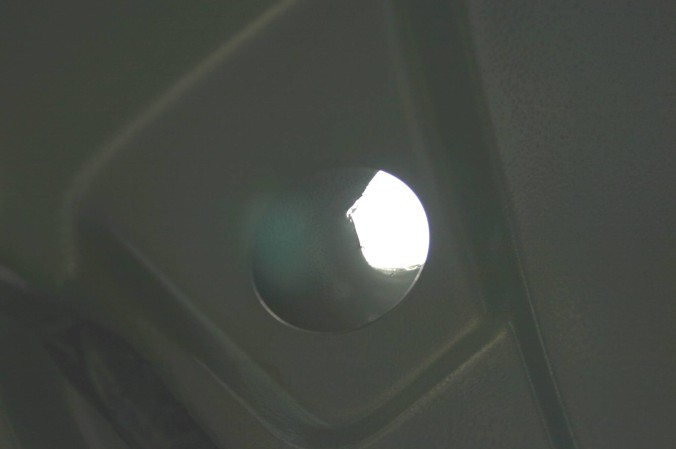
Here's the part that sucks. If you use the template, on the side lights the outer hole does not line up with the inner hole in the cab frame, as you would expect. The center hole lines up perfectly though. At first I thought I misinterpreted the instructions for lining up the template until I saw the center hole. This is, as I later found out, because the template is for 3rd gen trucks. The pics below show the far left light's holes, and the misalignment. I was still able to get the lights installed, kind of crunching the back end of the 194 bulb sockets on the sheet metal of the cab frame. I left the head liner out for a week to make sure none of the lights were going to leak, and before I put the headliner back in I pulled the 4 outer lights and cut out some of the cab frame hole with a die grinder so the bulb sockets and wiring could "breathe". Sorry, I did not think to take a pic of the cut out.
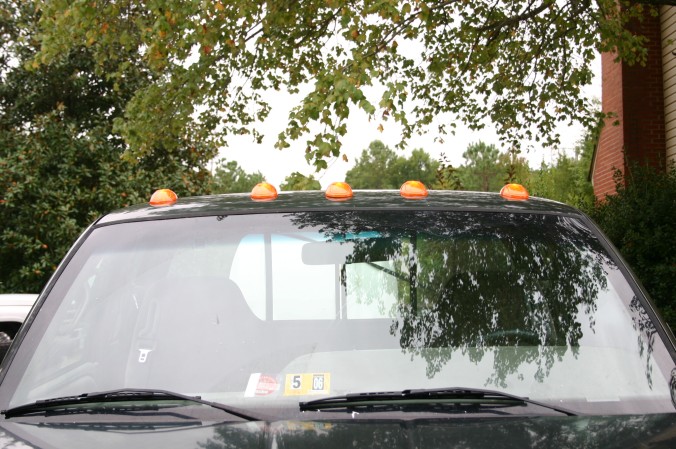
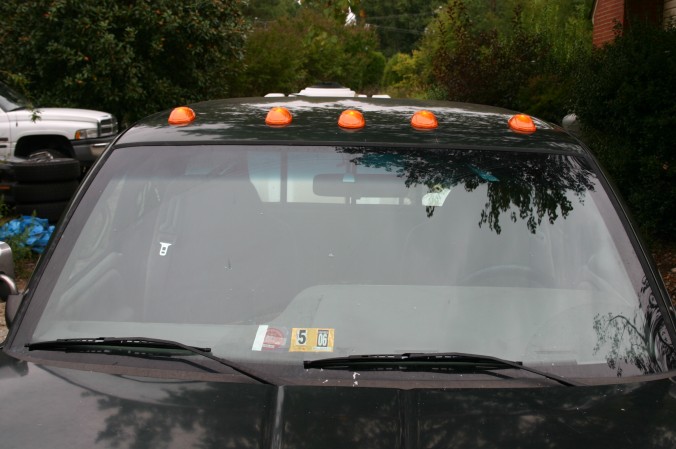
Cab lights installed. These pics were taken before I did the die grinder work mentioned above, so I know they will work if you don't have a die grinder handy.
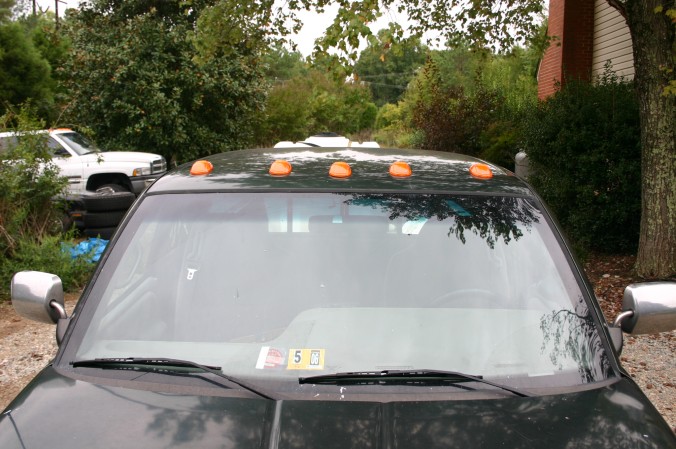
If it matters, the lights are on in the following 2 pics. As far as the wiring is concerned, if you get the later kit for your truck, the wiring instructions will not work as expected due to the different components used in later trucks. I just ran the wire down behind the left pillar cover and looped back up into the fuse box then tapped into the parking light fuse, on the down-stream side of the fuse.
Due to some people having problems with the headlight switches melting on some second gen trucks, you may want to consider wiring the clearance lights into a relay, or putting LED bulbs in these lights (they draw significantly less amperage). I am looking into the LED bulbs, but have not found clear 194 LED bulbs yet. I have heard other suggest that I should use amber 194 LEDs with my amber lenses, but I am not sold on that idea yet. I just feel like they won't be very bright. If I can ever find the clear 194s I will test this for myself to see what the difference its though.